The Poor Man’s Guide to a Low-Budget Product Photo Shoot

PhotoBlog

So, you’ve decided to open up a online shop and try to sell some of your products. Maybe you chose Etsy as your venue, or Shopify, Amazon Handmade, Ebay, or the rapidly growing Artyah. Wherever you decide to dip your toes in the waters of e-commerce, you are going to need to know how to do one thing really, really well: Take good pictures! Without an eye-catching, professional-looking, truly awesome picture, the likelihood of any potential customers clicking on your listing is about as high as Danny DeVito. In other words, not very.

Being brand new, you have a micro budget consisting of what you found in the couch this morning. No worries, I was in the same boat not too long ago when I decided to sell my handmade teddy bears and loveys online. After reading a lot, watching a ton of YouTube videos, and some trial and error, I figured out a pretty good Poor Man’s Setup for a professional photoshoot. I am in no way an expert, far from it, but I did figure out some things that work. I borrowed some items I had around the house, identified the best room in the house to shoot in, used the camera I already had, the photo editing software that came with the computer, and spent all of $8.  Today I am going to show you how I did it, and how, without knowing anything about photography or all the weird different words used to describe it mean (I still don’t know what a good shutter speed or ISO number is. I don’t even know what ISO stands for). After reading this blog and a little trial and error of your own, you should be able to produce photos of your product on par with these:

812016 (56)

Christmas Rudolph the Red Nosed Reindeer Baby Lovey / Security Blanket

DSC01145

Cockatoo Baby Lovey / Security Blanket

DSC01017

Teddy Bear

DSC01045

Owl Baby Lovey / Security Blanket

812016 (26)

Beaver / Groundhog Stuffed Animal

So, how do you do it? The first thing you need to figure out is where you will have the photo shoot. If your products are small you will need a table to put them on, and you will need several light sources. Natural light is best, but unless you have a solarium or conveniently placed skylight, it’s going to be hard to get natural light overhead. Also, you will be restricted in when you can photograph your items by time of day and weather conditions. I chose my dining room table. It’s large enough for what I need and the dining room already has a ceiling light. Hubby replaced all the house’s bulbs with LEDs a while back, so that is the type of light I will be working with. I scoot the dining room table over until the light is directly over it, and move on to the next step.Photoshootblog (14)

Next I find a tall box, roll out my white background and attach it to the box using clothes pins, binder clips, and/or tape. I spent about $8 at Wal-Mart for this roll of white paper. This was my only expense. It’s 30” (76cm) wide and I just roll it back up for next time when I’m done. White is a classic background and makes everything look more professional. It’s important to get something flexible and long that will curve up from the floor, rather than two separate pieces that you set up at a 90 degree angle for the floor and background. Unless it’s curved, you will get shadows in the corner and it won’t look as good.

Next you will want at least two more light sources, and it’s best if they are easily move-able. I borrowed a table lamp from the living room and a desk lamp from the bedroom. I removed the glass surround on the table lamp so it was just a bare bulb and used a single layer of (gift wrapping) white tissue paper taped over the lamps to soften the light. This reduces glare, harsh bright spots and gives your photos a more professional look. IMPORTANT: Do not leave flammable materials this close to a light bulb without constant supervision! My bulbs are LED and don’t get very hot, but it’s still not worth the risk to leave them unattended!

Now your set is all ready, time to start shooting! I do not know much about my camera. It is a Sony DSC-W830 and according to the online stat sheet, it has 20.1 MP pixels and an ISO of 80-3200. Some of you will know what that means, I do not. I bought it on sale and with a registry coupon a few weeks before my twins were born, and I think I paid $70-80 for it.

Camera

The next part is pretty much trial and error. Put your product on the set, move the lighting around until you’re happy and take a bunch of photos. I try and use the ceiling light as my general lighting source, one lamp is used as a spotlight on the part of the product I want to highlight (like the teddy bear or lovey face), and the third is dedicated to removing the worst of the shadows caused by the other two. It’s important to take a lot of photos. I generally shoot for a “usable five” photos for each product, One of the full product facing you, one showing the back, one ‘cuddly’ picture, and two close ups of the face at different angles. To get these five you will need to take 20-50 photos, and possibly more if you’re still experimenting with your lighting and camera angles. You are going to end up with photos that are blurry because you moved when you snapped the pictures, pictures that have too many shadows or with lighting that is too harsh, or just photos that don’t “do it” for you. If you take a lot of pictures, there are bound to be a few usable ones in there.

Photoshootblog (5)

Also be sure to play around with your camera’s menu settings. If you’re lucky like me, your camera will tell you what each setting is for: “this exposure is for shooting with florescent lights,” “this exposure is for shooting on bright, sunny days,” “this exposure is for shooting close ups with soft backgrounds” and so on. These make a big difference and it’s important to play around with them until you get the hang of it.

Photoshootblog (7)

Now that I have my routine down, photographing 3-4 new products, from beginning to set up to finish cleaning up, takes me about 1 – 1 ½ hours. On this day I was shooting three new teddy bears, including a white polar bear. White items are hard to photograph because they tend to blend into the white background. I like to use a wood shelf I borrow from the living room to add some classy contrast. Sometimes I have found that by moving the white item far away from the vertical white background I can also get a good result. It’s all trial and error.

Photoshootblog (11)Photoshootblog (8)

Next, after all the photos are taken and the set is cleaned up, comes the photo editing part. You will need to upload your photos into your computer (or download an app onto your phone if you’re using your camera phone) and get acquainted with the basic editing software. Once or twice I have gone as far as using the “touch up” feature when I noticed a bit of fluff on a close up I hadn’t seen during shooting, but 99% of the time all I use is the Crop function, the Brightness function to increase the brightness, and the Shadows function to reduce the shadows. I rarely use anything else. It’s not necessary to become an expert in Photoshop, and it’s best to keep your photographs as honest and true to the original as possible. Cropping and brightening only enhances the truth of your product—don’t do any weird photo-shopping like they do on models where they end up looking nothing like they do in real life. The photo may look fantastic—but they are selling a lie.

123

Here are some of the end results of this photo shoot:

Photoshootblog (12)Photoshootblog (10)Photoshootblog (6)

To sum up, here are my tips for your low-budget photo shoot setup:

  • Your background (preferably a clean white one) should curve up from the floor to the background to avoid shadows.
  • Use at least 3 different light sources. One as the main lighting, one to highlight the focal point of the product, and one to correct the shadows from the first two.
  • Use tissue paper to soften your light sources when needed.
  • Play around with your camera’s different features and functions. Figure out what looks best for your specific shoot.
  • Move your lights around. Don’t leave them static. As your product changes positions to get different angles, so should your lights.
  • Take more pictures than you think you need.
  • Figure out how to use the Crop, Brightness and Shadow Removal functions on your photo editing software.
  • Show pictures of your product from all angles.

I hope you found some usable tips in this blog. If you want to see more examples of my product photography, or if you just want to see more adorable teddy bears and loveys, check out my store at www.artyah.com/seller/SimpleChildhoods.

Posted in DIY, Economics, Photography, Saving Money | Tagged , , , , , , , , , , , , , | 2 Comments

Buttercream Ducky Birthday and Smash Cake Tutorial

Duckietutorial (10)

The twins just turned one and for their party I decided to make them something special. This was the second cake I’d ever decorated, so if I managed to pull this off, you can too!

Duckietutorial (6)

This cake was chocolate with a white, handmade buttercream frosting. For the cake itself, I used a popular modified recipe which is widely available online. It’s just a boxed cake mix with a few additions to make it less crumbly. I only did a single batch, but if you’re doing two smash cakes for twins (like I did) then I’d really recommend a double batch—the main cake ended up being pretty thin.

Cake:

1 chocolate or Devil’s food cake mix (with or without pudding)

3 eggs

½ cup water

½ cup vegetable oil

1 small package (3.9oz or 110g) of instant pudding mix—just the powder, don’t make pudding. Omit this if your cake mix already has pudding in it.

1 cup sour cream

Mix all your dry ingredients and wet ingredients separately, then combine and mix well.

For the pans, I used a 9X13” dish for the main cake, two small glass bowels for the smash cakes, and a (cleaned) porcelain egg crate I keep in the fridge to hold my farm-fresh eggs. You need something with multiple small round-ish compartments that is oven safe. A metal ice cube tray would also work, or a form for cake pops. These will make the ducky’s bodies.

Grease and dust these pans very well. I used olive oil spread with my fingers and then dusted flour all over them until the oil was covered, then shook out as much flour as I could. The whole point of making this cake is for it to look good, so don’t just spray and pray for this step—it’s important.

Pour your cake batter into the various pans and bake in a 350F preheated oven for 30-35 minutes or until a toothpick comes out clean. Allow to cool completely before carefully removing from the pans. The cakes need to be completely cool before the icing is added.

For the icing, I used the classic Wilton’s buttercream icing recipe. For this I did do a double batch. There is enough in one batch to icing a cake, but for decorating it also you really need a double batch. I had a comfortable amount left over but would have been short with just one batch.

Icing:

½ cup Crisco

½ cup unsalted butter, room temperature

1 teaspoon vanilla extract

Approximately 1 pound (1/2kg) powdered sugar

2 tablespoons milk, reserved.

Most people when they make homemade icing have one of those electric mixing bowls that do all the work for them. Those look awesome! I don’t have one of those. I have one of these:

Duckietutorial (1)

It took a lot of whipping. A lot. The birthday party was two months ago and I’m just now recovered enough to type this post.  Not really—it wasn’t that bad and not nearly as messy as I hear people complain about with an electric mixer. I used my largest mixing bowl and mixed the Crisco and butter together with the vanilla until combined, then I slowly added a cup at a time of the powdered sugar. I mixed each cup gently into the cream mix with a regular mixing spoon and after it was fully moistened used the whisk to beat in some air. Almost no mess, and the whipping itself was minimized. After the powdered sugar is fully added and the icing is whipped, you will want to set aside enough of this thick icing for all your decorating—any icing you will need to put into a piping bag will need to be thick. What’s left over you add the milk to, one half-tablespoon at a time until it is thin enough to spread comfortably.

I made the icing a few days ahead of time so I could add my coloring and allow it to sit. The colors will become more vibrant if allowed to sit for a day or two, and the icing is safe to store at room temperature for up to two weeks. You will want to use the gel icing food coloring, not the regular liquid food coloring because that will change the consistency and thin out your icing. For this cake I make about two cups of blue, two cups of yellow, a half cup of orange for the duck bills and a tiny amount of black for the eyes.

Now for the good stuff! To decorate I used standard icing bags and Wilton icing tips #352 (Leaf tip), #18 (Open Star tip) and #3 (Round tip). First I spread the white icing all over the sides and outside tops of the main cake and the two smash cakes, then I spread the blue icing over the areas with no icing (for the “water” areas). I allowed this layer to harden.

Duckietutorial (20)

The duckies were made separately. I found a lot of tutorials on how to make fondant ducks, but I hate fondant and wanted it to be fully buttercream, so this was my own creation. I had a total of 12 egg carton cake balls but ended up using several for practice and ended up with eight—six for the main cake and one for each smash cake. It’s important to allow each layer of icing to fully dry, so it takes a long time from start to finish. I cut squares of parchment paper to keep each duck on while I worked.

Duckie Cake3

First I used a regular butter knife to spread yellow icing all over the cake balls that would become the duck’s bodies. The rest of the yellow icing I put into a pipping bag with a leaf tip. On each side of the duck’s body I made two parallel lines for the wings and on the duck’s little butt I made a single vertical ridge for a tail.

Duckietutorial (5)

The head was made using the star tip and is really just a blob of icing opposite the tail. After the head fully hardened, I again used the leaf tip with the orange icing to make two parallel lines for the duck’s bill. After that I just used a toothpick to carefully place a dot of black icing for each eye, and my ducks were done!

To place them on the cakes, I used some leftover yellow icing to make a blob where I wanted to duck to go. This acted as a “glue” for the duckies. Then I (very carefully) picked up the ducks with my hands and placed them on the blob. Once it was positioned correctly I used more yellow icing with the round tip to fix any bits of icing that my fingers took with them and to run a line of icing all around the base of the ducky for additional “glue” and stabilization.

Duckietutorial (7)

Once that was done I used the round tip to write “Happy Birthday” on the cake and put it in a very safe place until the guests arrived. It wasn’t difficult to make, just mostly time consuming since each layer of icing had to harden before the next step could be done. At first the boys weren’t sure what the cake was, but they sure enjoyed eating it once they figured it out! And the cake was a big hit with the family!

Birthday collage

Hope you enjoyed this little tutorial, feel free to Pin it and if you liked the baby bibs my twins modeled, please check out my store on Artyah.com, where I sell my handmade teddy bears, lovey and bibs!

www.artyah.com/seller/SimpleChildhoods    Happy baking!

Posted in Cooking, DIY, Recipes | Tagged , , , , , , , , , , | 4 Comments

6 Weird Ways to Save Money on Your Air Conditioning Bill

image

Feeling the heat? It shows up not just on your skin, but in your wallet, too. Here are six weird ways to keep excess heat out of your house and save money on your summer electric bill doing it!

image

1: Use Your Celing Fans Correctly

Make sure your celing fans are set to summer to cool you down, instead of heating you up. There is a little switch on your fans just below the blades. In most cases, the fan spinning clockwise is for winter and counter-clockwise is for summer.

image

2. Use Your Exhaust Fans More

Run your exhause fan for several minutes longer after a hot shower in the bathroom or cooking in the kitchen. Remove all that hot air immediately to keep your AC from kicking into overdrive.

image

3. Identify the Sunny Windows

If you’re like me, you’ve got one or two windows that face due South and are bathed in beautiful, wonderful, hot-as-heck natural light in the summertime. I’m not saying turn your house into a dungeon, but you will be amazed at the difference in temperature once you block just one sunny window. Blackout curtains arn’t enough-you need something reflective to bounce all that heat back outside. For a long time I used a big piece of cardboard with alluminum foil taped on one side in my sunniest window. Now I’ve upgraded to some reflective fabric and no-sew sticky velcro. In the wintertime, I un-velcro my reflective fabric and store it, leaving my normal curtains. I do this for just my two sunniest windows, and noticed an immediate reduction in how often my AC turned on. You can cover your window for about $10 in supplies. The no-sew velcro you can buy at a craft store and this link has some of th same reflective fabric used in insulated bags sold by the yard: https://www.fabric.com/buy/0328317/insul-shine-22-mylar-poly-batting?cm_vc=683e9d5e-c04e-4b72-9124-39165e4fc1c1

image

4. Update Your Summer Landscaping

The more shade on your house, the less heat it collects. I’m not a fan of planting large trees near a house for safety reasons (I live in hurricane central), but there are lots of plants that can shade a sunny window and all but dissapear in the winter. Elephant ears are a great example–they can grow 12′ tall or more, make a terrific sun shade, and die back to a bulb in the winter. Talk to your local plant nursery to see what grows best in your area.

image

5. Use Your Dryer Less

You’ve heard of clotheslines, but they are a hassle and require so much space! However, there are ways to efficiently use a small clothesline to really put a dent in your electric bill this summer. Use a smaller clothesline to dry washloads of heavy, bulky items such as jeans, towels, and blankets. These items dry surprisingly quickly in the sun, take up little space, and are quick to hang. Just line drying your jeans and towels will save hours of running a dryer, which uses a lot of electricity and pumps a lot of heat into your home. For other loads, try poping a dry towel in with your wet load and removing the towel after 10 minutes of drying. The towel will absorb a lot of the water from the otehr clothes and you can dry the load in less time. Line dry one towel and you’re saving money!

image

6. Meal Planning

This tip requires a bit more organization, but it’s not that hard. Try to plan meals that you can cook in a toaster oven, griddler or microwave versus an oven or stovetop. Make grilled cheese instead of frozen pizza, or chilled cut fruit instead of cooked vegetables. Instead of cooking beef on a skillet for tacos, try a vegetarian version with canned refried beans and some seasonings. If you must cook a casserole or something that requiers the oven stay on a long time, cook a double batch and freeze the rest for a meal next week. You’ll be saving yourself money and time! Also reconsider your side dishes; most pasta requires you to keep water boiling for 7-10 minutes, but mashed potato flakes only require the water reach boiling. That’s a lot of heat not being pumped into your house from just one side dish!

If you liked these tips, be sure to subscribe to my blog. If you have time, also check out my Etsy store, http://www.etsy.com/shop/SimpleChildhoods where I sell handmade teddy bears, bankies and baby bibs. Hope these tips will help you out. Stay cool this summer!


Posted in DIY, Economics, Homestead, Saving Money, Uncategorized | Tagged , , , , , , , | 3 Comments

Using up Old Jarred Baby Food to make Healthy, Easy Toddler Snacks

So, the twins are almost a year old now (I’ve almost made it!!!) and I deserve cake, dammit! But before the traditional birthday sugar rush, I wanted to share a great recipe I developed for using up all those millions of jars of baby food that my boys are now “too big” to want–all they want is the real stuff and won’t touch the mush! Of course, I had stocked up on sales and whatnot and still have a ton of these things, so I started experimenting on how to use them up. Hope this helps you!

TabletpicsMay2016137edit

We’ve been following Baby-Led Weaning but were still offering a meal per day of jarred baby food, mostly out of convenience. However, the time quickly came when the twins just wouldn’t have it anymore. This recipe will use up 6 4-oz jars of Stage 1 or 2 baby food and provide several baby snacks. It is very healthy with lots of oatmeal and, of course, the vitamins packet into those little jars! I’m using Gerber brand, but whatever brand you have on hand is fine.

You will need:

2 4-oz Stage 1 or 2 jarred baby banana food  (If you’re out of baby banana food, two       well-ripened bananas, with the brown areas cut off and mushed until liquid will also work.)

4 4-oz Stage 1 or 2 jarred baby foods, whatever flavors you have on hand.

2 Cups old-fashioned oats

1 1/2 Cups Baby cereal. If you don’t have any cereal left, substitute with 1 Cup whole wheat flour

Dash (around 1/8 teaspoon or so) Cinnamon

Splash (around 1/2 teaspoon or so) Vanilla Extract


We are going to make a base and then separate the base to make four separate mini sweet bread snacks. Mix together jarred banana, oatmeal, baby cereal, cinnamon and vanilla extract until well combined. Mixture will be dry, but that’s okay because we will be adding more liquid soon. Then, separate into four equal portions, in four separate mixing bowls.

Tablet pics May2016 138


Now simply add one of your remaining jarred baby foods into each bowl to make your different flavors. I used Pear/Pineapple, Pumpkin/Sweet Potato, Apple/Prune, and Peas. I was a little hesitant to use the peas, but it ended up tasting great and being one of the boy’s favorites! I have used a dozen or more different flavors so far, and really haven’t found any that clash. As long as my babies liked the flavors when they were eating them from the jars, they have liked them as these sweet bread snacks.

Tablet pics May2016 139

Now it is time to cook our toddler snacks. Grease four small baking dishes. I have also used just one big 9X13″ pan–the batter is thick enough that you can spoon the batter in and shape it to not touch the other batters. Just make sure you have enough room to spread the batter thinly without touching the other batters. To grease, I just pour in a little bit of olive oil into the pan and use my fingers to spread it around, but whatever method you prefer will work.

Tablet pics May2016 140

Now bake at 350F for 30-40 minutes, depending on your particular oven. When finished, the bread snacks should be browned on the edges and pulling away from the sides of the pan. When done, allow to cool completely.

Tablet pics May2016 141

Then I just cut into little bite-size squares, toss in a small plastic container and store in the fridge. These are served cold, so when snack time rolls around all you have to do is grab your container from the fridge and you have a healthy, homemade snack with no added sugars that cost you almost nothing (since you were going to throw the jars out anyway)! Talk about a Mommy Hack! These will store in the fridge for around 3 days, and will freeze for several weeks. My boys get these almost every day, and they just Yum them up!

May2016 067

Also, P.S. Shameless Plug: If you love these bibs, check out my new Etsy store! I sell cute baby bibs and handmade teddy bears and loveys! Simple Childhoods

May2016 064

Posted in Baby Led Weaning, Cooking, DIY, Recipes | Tagged , , , , , , | 1 Comment

DIY Mini Veggie Steamer

My baby boys have started solid foods! We are trying Baby-Led-Weaning with our twins, which involves delaying the start of solids until around six months and skipping the mushy baby food-from-a-spoon altogether. Chip-sized portions of well-steamed veggies, slices of ripe avocado and cucumber, and after that soft fruits, are what’s on the menu to start–things firm enough so they can pick it up and put in their mouths themselves, but still soft enough to be easily gummed. With this new adventure comes the need for multiple batches of tiny amounts of steaming everyday. Using and washing my big family steamer was not something I was looking forward to. So, I just made a mini steamer using things I had laying around. This would also be appropriate for steaming a single adult’s portion.

mini-steamer-001

DIY Mini Veggie Steamer

For this project you will need:

(1) Two small plastic food containers that nest together with a bit of airspace in between.
(2) One lid that fits the food container.
(3) Small drill or something to poke holes into the plastic with.

This is a great way to reuse containers that you’ve lost a lid for, that have a cracked bottom, or that you just don’t like anymore. I am using round Ziploc 2-cup containers, but you can use any size you want. If the containers are dishwasher safe, your mini steamer will be, too.

Decide which container will hold the veggies and which will hold the water. If one of your containers already has a hole or crack in it, use it for the top (veggie) portion.

Mini Steamer 002

Drill or poke holes into the bottom of the veggie container. Be generous with the number of holes. You’re done! Just add a small amount of water to your bottom cup, nest the veggie cup into it, add your veggies, snap on the lid and microwave until done.

Mini Steamer 003

Cost: $0.00, Time: Less than 10 min. Recycles items that would otherwise be thrown away, and sure beats this $30 1-person steamer from Bed, Bath and Beyond!

30 dollar steamer

Posted in Baby Led Weaning, Cooking, DIY, Economics | Tagged , , | Leave a comment

What’s the Big Deal About Cloth Diapering (Twins!)?

Hello all! It has been a very long time since I last posted. Lots of health issues and life changes-all resulting in a very long story that I will spare you from. So, shall we get right back to posting? One thing you should know–hubby and I recently started our family, with twin boys! Like I said, lots of life changes….

Our boys are now three months old and are cloth diapered. It’s amazing how much backlash we’ve received on this topic–and from people who have never even seen a cloth diaper, much less ever used one! We were told there was no way we could ever cloth diaper twins, that the extra laundry would be all-consuming, and that having to deal with all that poop would be too gag-inducing. They were wrong. Here is our story.

My husband describes me as half hippie, half redneck. As such, I’ve always been interested in cloth diapers as a way to both save money, save the environment, and save sensitive babies from having lots of chemicals on their sensitive areas.  When we found out I was pregnant, we were just coming out of a long, dramatic health crisis and were about to start on a long, dramatic money crisis as a direct result of it. I crunched the numbers and determined that cloth diapers were really the only financially solvent option. For the cost of three months of disposable diapers, we could have all the cloth diapers and supplies we would need to get the kid through potty training. This was the main reason for our decision. The rest of the hippie stuff was bonus 🙂

So, the main issue to starting cloth diapers is education–disposables are so easy and everyone who has ever tended a child knows how to use them, so advice is easy to obtain. Cloth diapers are a bit new-age-y and can be difficult to navigate. There are so many different kinds of cloth diapers, and (in truth) only one kind of disposable. There is also conflicting information about how to care for the diapers. It’s very confusing at first. I was still in the throws of learning the difference between prefolds, pockets, hybrids, and all-in-ones when we went for our 18-week ultrasound to find out the sex of our baby. Turns out, it was babies–TWINS! Despite having a 9-week ultrasound that clearly showed only one blob baby, and growing and gaining weight appropriate for one baby, we were now looking at two perfectly formed baby ultrasound skeletons. Sharing our shock was our joy, and we laughed and smiled through the rest of our day, using up pretty much all our phone minutes and trying to get our head wrapped around the idea of twin boys.  After a few weeks passed, I decided that we would be a prefold family.

Prefolds are so named because they are “flats” that have been conveniently folded for you. Flat diapers are just a square piece of cotton that you fold in such a way that the middle has many layers of fabric, and two ‘wings’ have fewer layers, such as 2-4-2 or 4-6-4 or something like that. Prefolds are thus, “Pre-folded”. They are the least convenient, but also the least expensive option by far–each diaper costs $1-$2, they come (generally) in three sizes although some companies make lots of sizes, and they require a waterproof cover which can be reused for several diaper changes. Because you are still basically using a flat(ish) rectangle of cloth, you must utilize on of a dozen or more types of folds. This is both good and bad, for reasons I will share below. Very few people use flat diapers anymore. You may also see fitted diapers; “fitted” diapers are just prefolds that have a few snaps and leg elastic added, and do not require you to fold them while diapering the kid.

Pocket diapers are the next step up, both in convenience and cost. Pockets consist of a waterproof cover and an inner ‘pocket’ which is designed to be stuffed with absorbent inserts and doublers. A doubler is just an extra insert–you can have two of the exact same inserts, the first will be your insert, the second your doubler. These are almost always microfiber or other synthetic materials.  They are convenient because once you have stuffed them, their use is similar to a disposable–no folding or multiple pieces. The level of absorbancy is also easy to adjust, just add more or bigger inserts for nighttime and fewer or smaller inserts for daytime. Each pocket diaper is good for one diaper change and costs between $15-$18 each, plus inserts, which can run from $3-$12 each. One nice thing about pocket diapers is that most come with a disposable option–disposable inserts can be purchased for as little as $0.25 each and used when on vacation or when a washing machine isn’t available. This is a big plus to families who like to travel but want to avoid the chemicals in disposable diapers.

Hybrids are a cross between disposables and pocket diapers. They consist of a waterproof cover which can be used for multiple diaper changes and are designed to be used with a variety of liners. They lack a true pocket and so cannot be prepped ahead of time, but they have the most options: natural cloth fiber liners, synthetic liners, disposable liners. Instead of a pocket, they utilize a ‘pseudo-pocket’ which is really just a flap on the back and front of the diaper to keep the inserts in place.  A hybrid cover can be used with prefolds or fitted diapers, allowing the option of future expansion into synthetics and disposable liners without having to buy different covers. They run around $10-$18 each, plus liners.

All-in-One diapers are basically cloth disposable diapers. It’s one piece, you don’t have to stuff, fold or worry about how many inserts to use. You also don’t have to un-stuff dirty liners, but they lack the ability to adjust absorbancy. They are very easy for people who don’t cloth diaper to use, because it’s exactly like a disposable. They are by far the most expensive: $20-$25 each and they are only good for one diaper change. Few people use All-in-Ones exclusively, but many people will purchase 3-4 of these just for babysitters and grandparents to use while mom and dad are away.

Keep in mind that within each of the above categories are numerous brands and options, adding to the confusion. My decision to use prefolds was mostly based on cost, but also on dependability. Just like with disposables, parents often have to shop around different brands before finding one that fits their particular baby well. All babies are different, and even the best, most expensive cloth or disposable diaper may fit poorly and cause leaks. The true benefit of prefolds, is that there are so many ways to put them on a baby. Prefolds will always work-once you find the right fold. Knowing two entirely unique babies were on the way, going with prefolds allowed me to have my entire stash purchased, prepped and ready to go before the babies arrived with the confidence of knowing I hadn’t just blown a ton of cash on a system that may work poorly for one or both babies. I also didn’t run the risk of having two separate types of diapers to keep track of–the entire system is used for both children fluidly. I just use different folds for different kids.

Blog 9-15 072

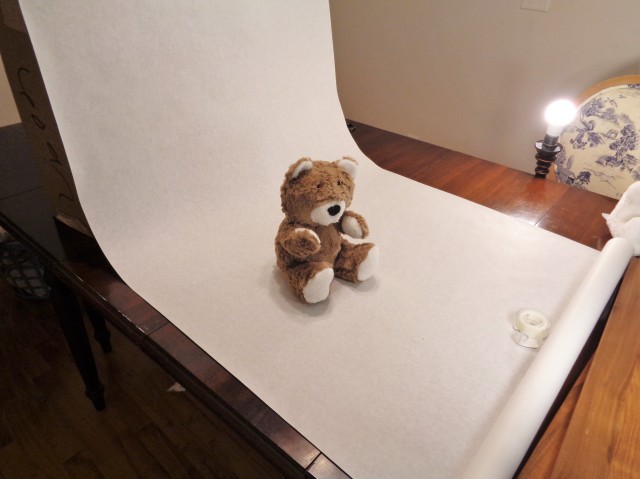
These are my prefolds. They come in three sizes: Preemie (5-8lbs), Infant (8-15lbs) and Regular (15-35lbs). My boys are now around 13lbs each, 3 months old and using the Infant size. The others are not sitting unused, however. The preemie size is perfect for burp / spit-up rags and face cloths. Even though my twins are using the middle size, I have been putting them in the larger Regular size diapers at night for extra absorbancy. Once they are fully in the Regular size, I can fold the Infant size diapers into thirds to use as doublers for extra absorbancy. So, all three sizes will be used for the remainder of their diapering career.

Blog 9-15 073

Regular size diapers are also great to use as a spit-up catcher in the crib and bassinets. Instead of waking up both babies several times a night (and day) to change the crib sheets after a spit up, I just lift the offending twin’s head to replace the diaper.

How to Diaper Using a Prefold

Blog 9-15 083

These are the supplies you need to change a diaper using a prefold system. It looks complicated, but it isn’t. Most people comment on how fast I can diaper a baby when they watch me do it. Just takes some practice, like all things do. Top left is the waterproof diaper cover. I use Flip covers, which are technically hybrid covers. I also own a few Econobum covers, which are pretty much the same thing just without the ‘pseudo-pocket’ (see above explanation). Top middle is a liner. This is optional. It’s just a thin strip of polyester to create a barrier between the baby’s skin and the wet diaper to prevent diaper rash. My boys are prone to rash without this liner. They cost $1 each, so I bought enough for each diaper and I haven’t had a diaper rash since. They are made by BumGenius. Top right is a cloth wipe. I use GroVia wipes. Wet diapers don’t need a wipe, and most poopie diapers only need one wipe. The most I’ve ever used for the messiest diaper is three wipes. Purchase one wipe for each diaper and you’ll be golden. Bottom left is a Snappie–most people use this instead of diaper pins nowadays. It’s a stretchy plastic ‘T’ with teeth at each point to secure the diaper. Like the cover, they are used for multiple diaper changes. The giant cloth on the bottom is the prefold diaper itself.

Blog 9-15 076

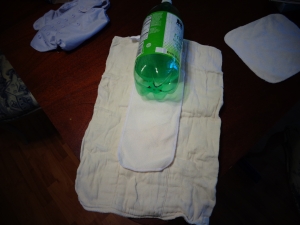
My babies are napping now, which is the only way I’m able to write. With twins, you will have a great amount of empty caffeine containers. Pretend it’s a baby. You place the liner on top of the prefold and place both under the baby.

Blog 9-15 077

Now just flip the liner to cover the baby’s bits. This will ensure that the liner is in contact with the baby and doesn’t get tangled up the the fold you are about to do.

Blog 9-15 078

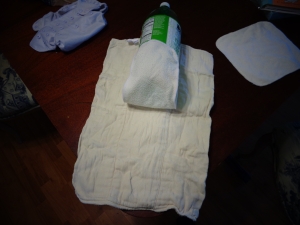
Now, starting at the bottom of the baby’s bum, just fold over the two ends like so.

Blog 9-15 079

Bring the folded portion up between the baby’s legs and cover the liner.

Blog 9-15 080

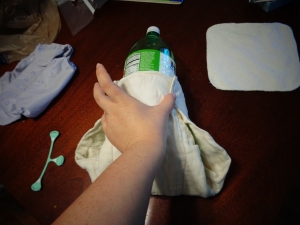
Bring the two wings on either side up to meet the front. Legs stick out of those two side holes.

Blog 9-15 081

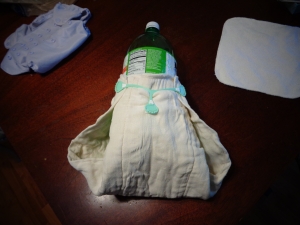
Then use the Snappie to secure. Be sure that it’s snug around the legs. This is called an Angel fold. It works pretty well for most babies. There is also the Flip fold, the Newspaper fold, the Jellyroll fold, the Trifold, and so, so many others. One or more of these many folds will work for your baby, so you don’t have to worry about investing in a lot of the ‘wrong’ diapers. This is another reason why prefolds are so great for families who plan on using cloth for multiple children.

Blog 9-15 082

Secure the waterproof cover (make sure it fully covers the diaper) and you’re done! One of the nice things about prefolds is that-in reality-as long as all the cotton diaper material is stuffed inside the liner-no matter how badly you messed up the fold-it won’t leak. Cloth diapers really don’t leak per say, they wick. So, if a piece of cotton diaper is sticking out of the cover, it will wick up the baby’s outfit, but you’re not going to get a leak that drips unless the diaper cover is waaaaay too loose. See all those snaps? Cloth diaper covers typically come in one-size-fits-all. All those extra snaps allow one cover to fit babies from 8-35lbs, so you only have to buy one set of covers. Newborns smaller than 8lbs, and even some larger newborns since they are shaped differently at birth, will need newborn covers.

Prepping Prefold Diapers

All cloth diapers must be prepped. I don’t know much about prepping other type of cloth diapers, but I do know about prefolds.

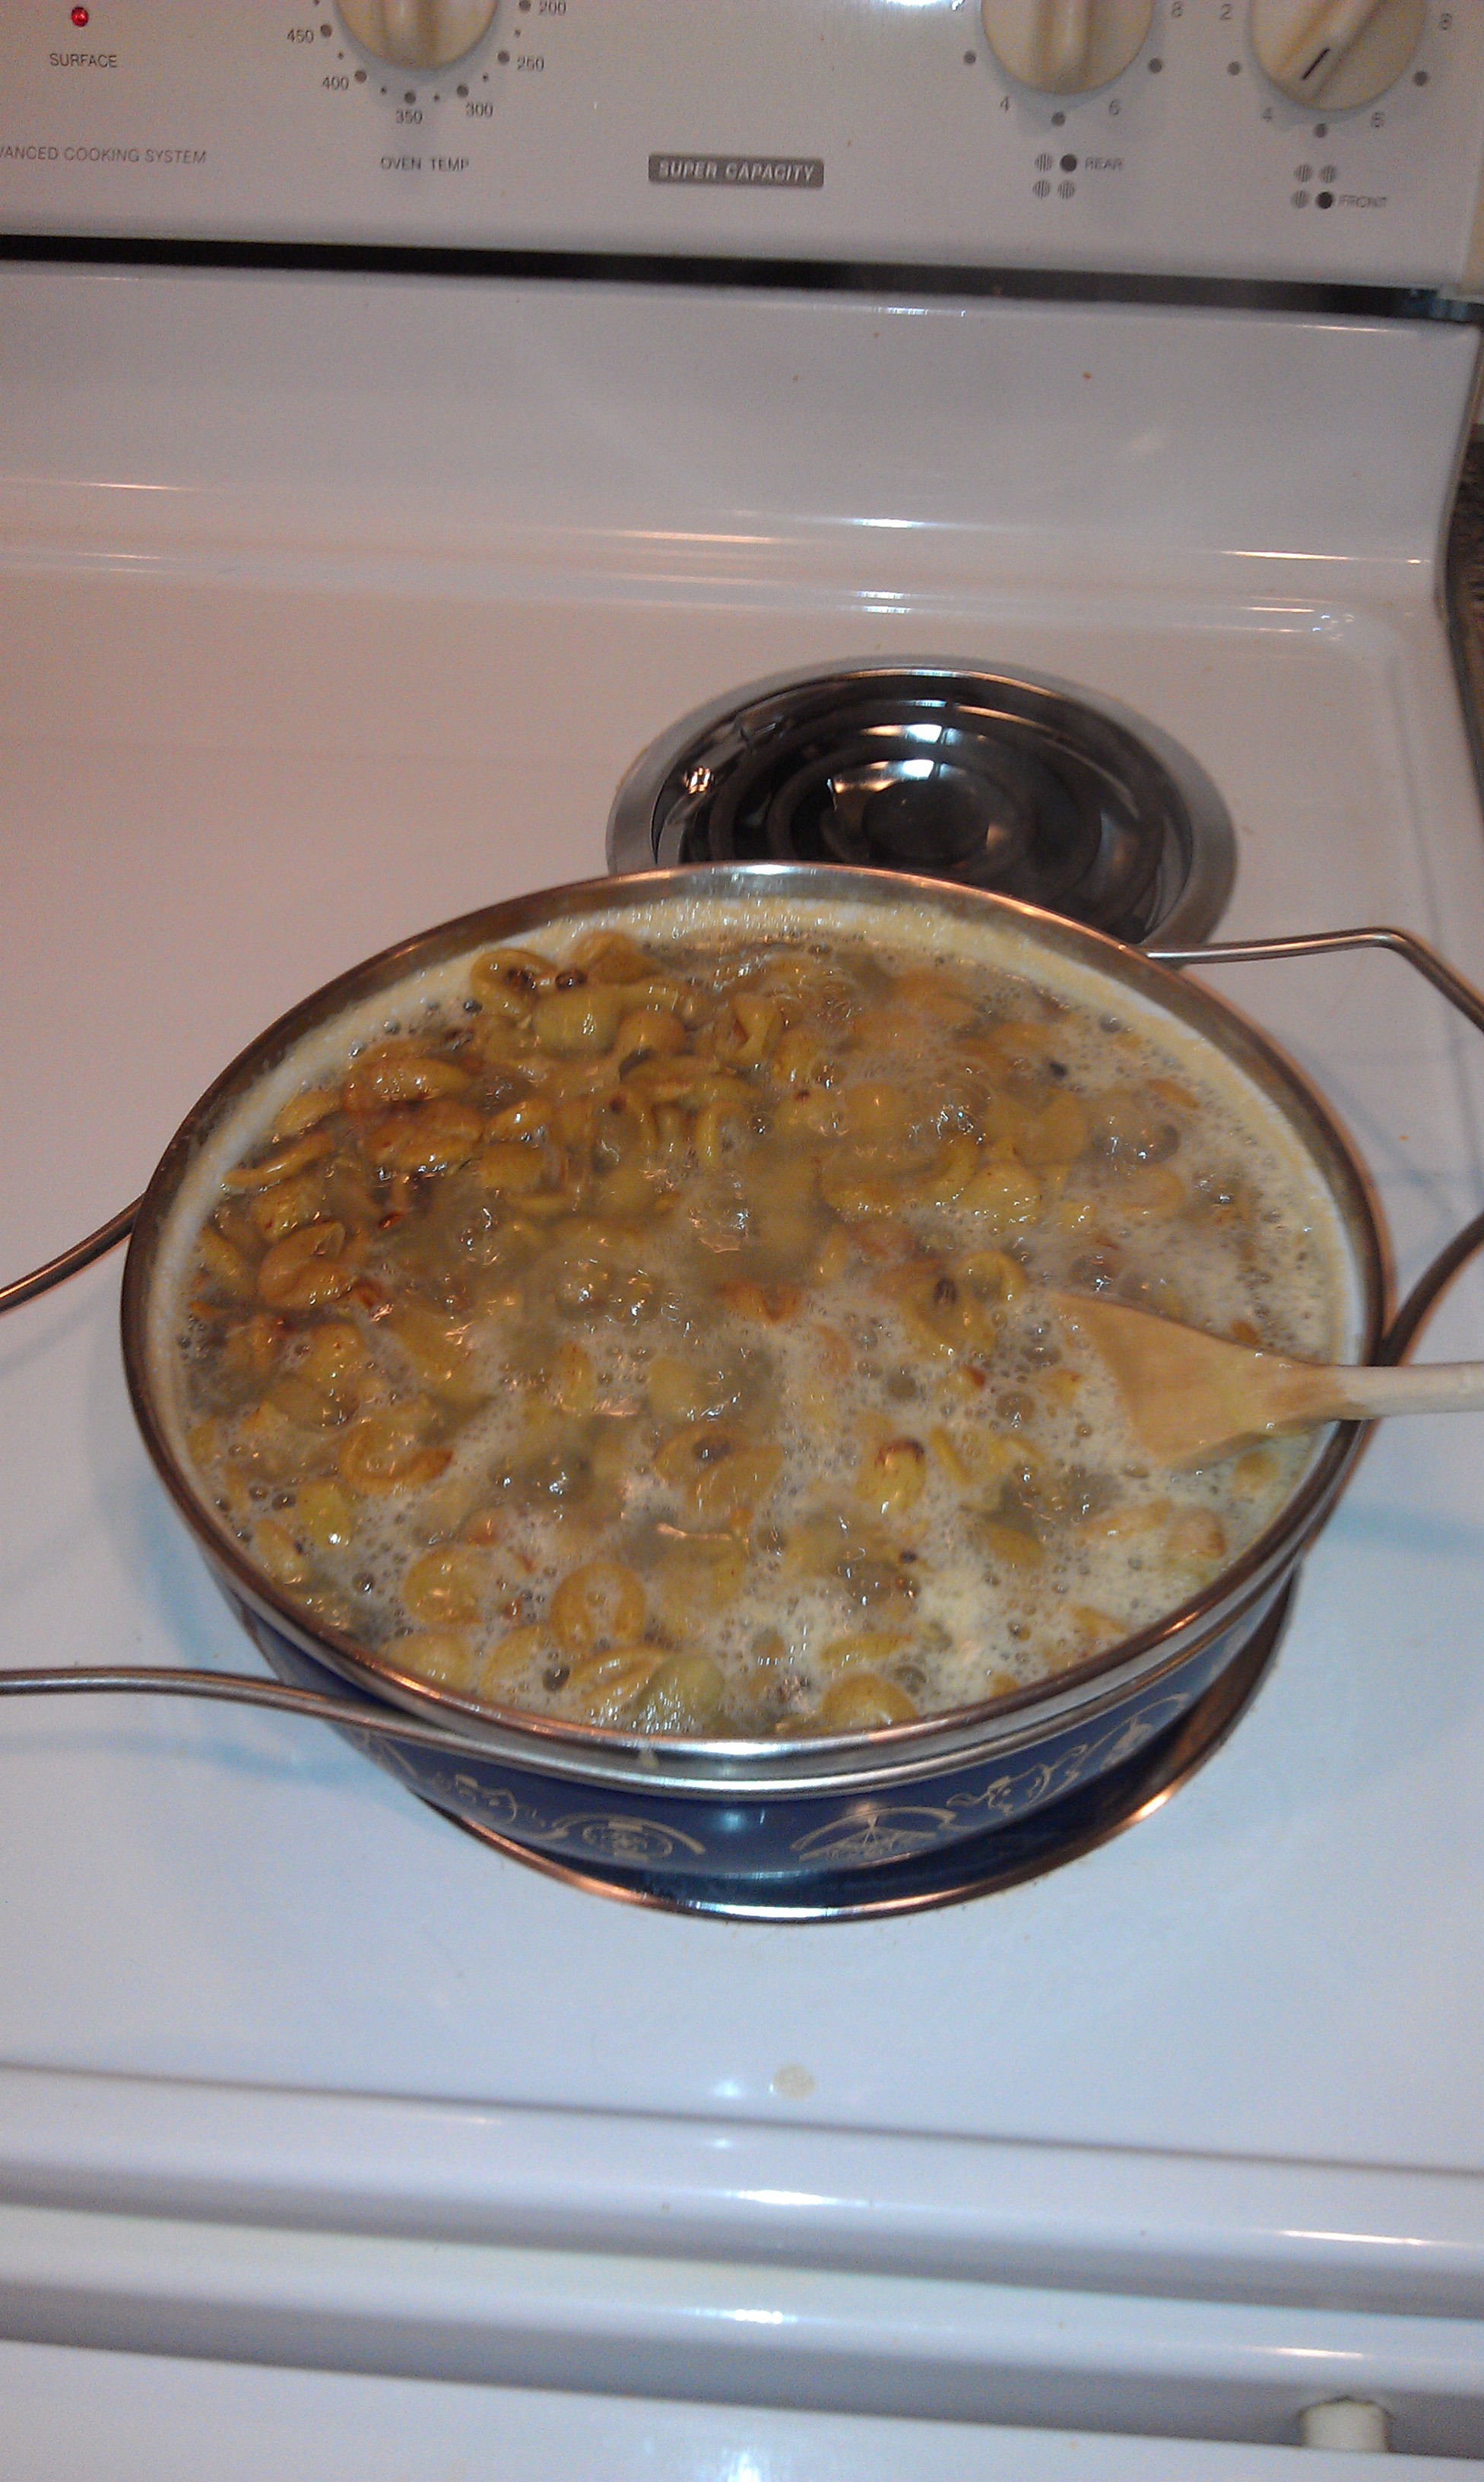
I purchased unbleached indian prefold diapers. Chinese cotton, organic and bleached options are also available. Bleached diapers need very little prep, just one or two cycles in the washing machine and you’re ready, but they tend to wear out quicker. Prepping removed the natural oils in the cotton which prevent maximum absorbancy. Since bleached cotton is more processed, most of the oils have already been removed. The manufacturer recommended 6-8 wash cycles (with detergent) for my unbleached Indian prefolds. Now, boiling the diapers for 15 minutes is the equivalent of 3-4 washes. I washed my diapers for one cycle, boiled for 15 minutes, and washed for another two cycles. No need to dry them in between unless you are going to let them sit for a day or more.  This process can be done in a day, or over several weeks. You can wash just the diapers in one big load, or add a few diapers to your normal washes here and there. Chinese cotton is a bit sturdier, lasts a bit longer, but takes longer to prep, say closer to 10 wash cycles. Chinese cotton is also a less popular option but may be the best for your family if you are wanting the diapers to survive three, four, or more children. They are the same cost as the Indian cotton. Covers, liners and wipes typically just need one wash cycle to be ready.

Prefold Diaper Care and Cleaning

Again, I don’t know much about other cloth diapers, but I do know about prefolds. Now, there is so much conflicting information out there about how to wash your diapers. So many blogs which say your diapers will be ruined if you do X, if you don’t do X, if you use this detergent, if you have hard water, line dry vs. dryer, and so on. It’s really not that complicated. Cotton prefolds are 100% cotton. It’s just cotton-it’s pretty forgiving. The waterproof liners are less forgiving, but still pretty simple.

The most important issue with cloth diapers is that they must be sterilized. This prevents bacteria from growing in them and causing rashes, smells and other problems with your baby. There are two ways to sterilize prefolds: Either wash them in hot water and dry them how you please, or wash them in cold water and hang them in the sun to dry, letting the UV sterilize them for you. One of these two options will sterilize the diapers just fine.

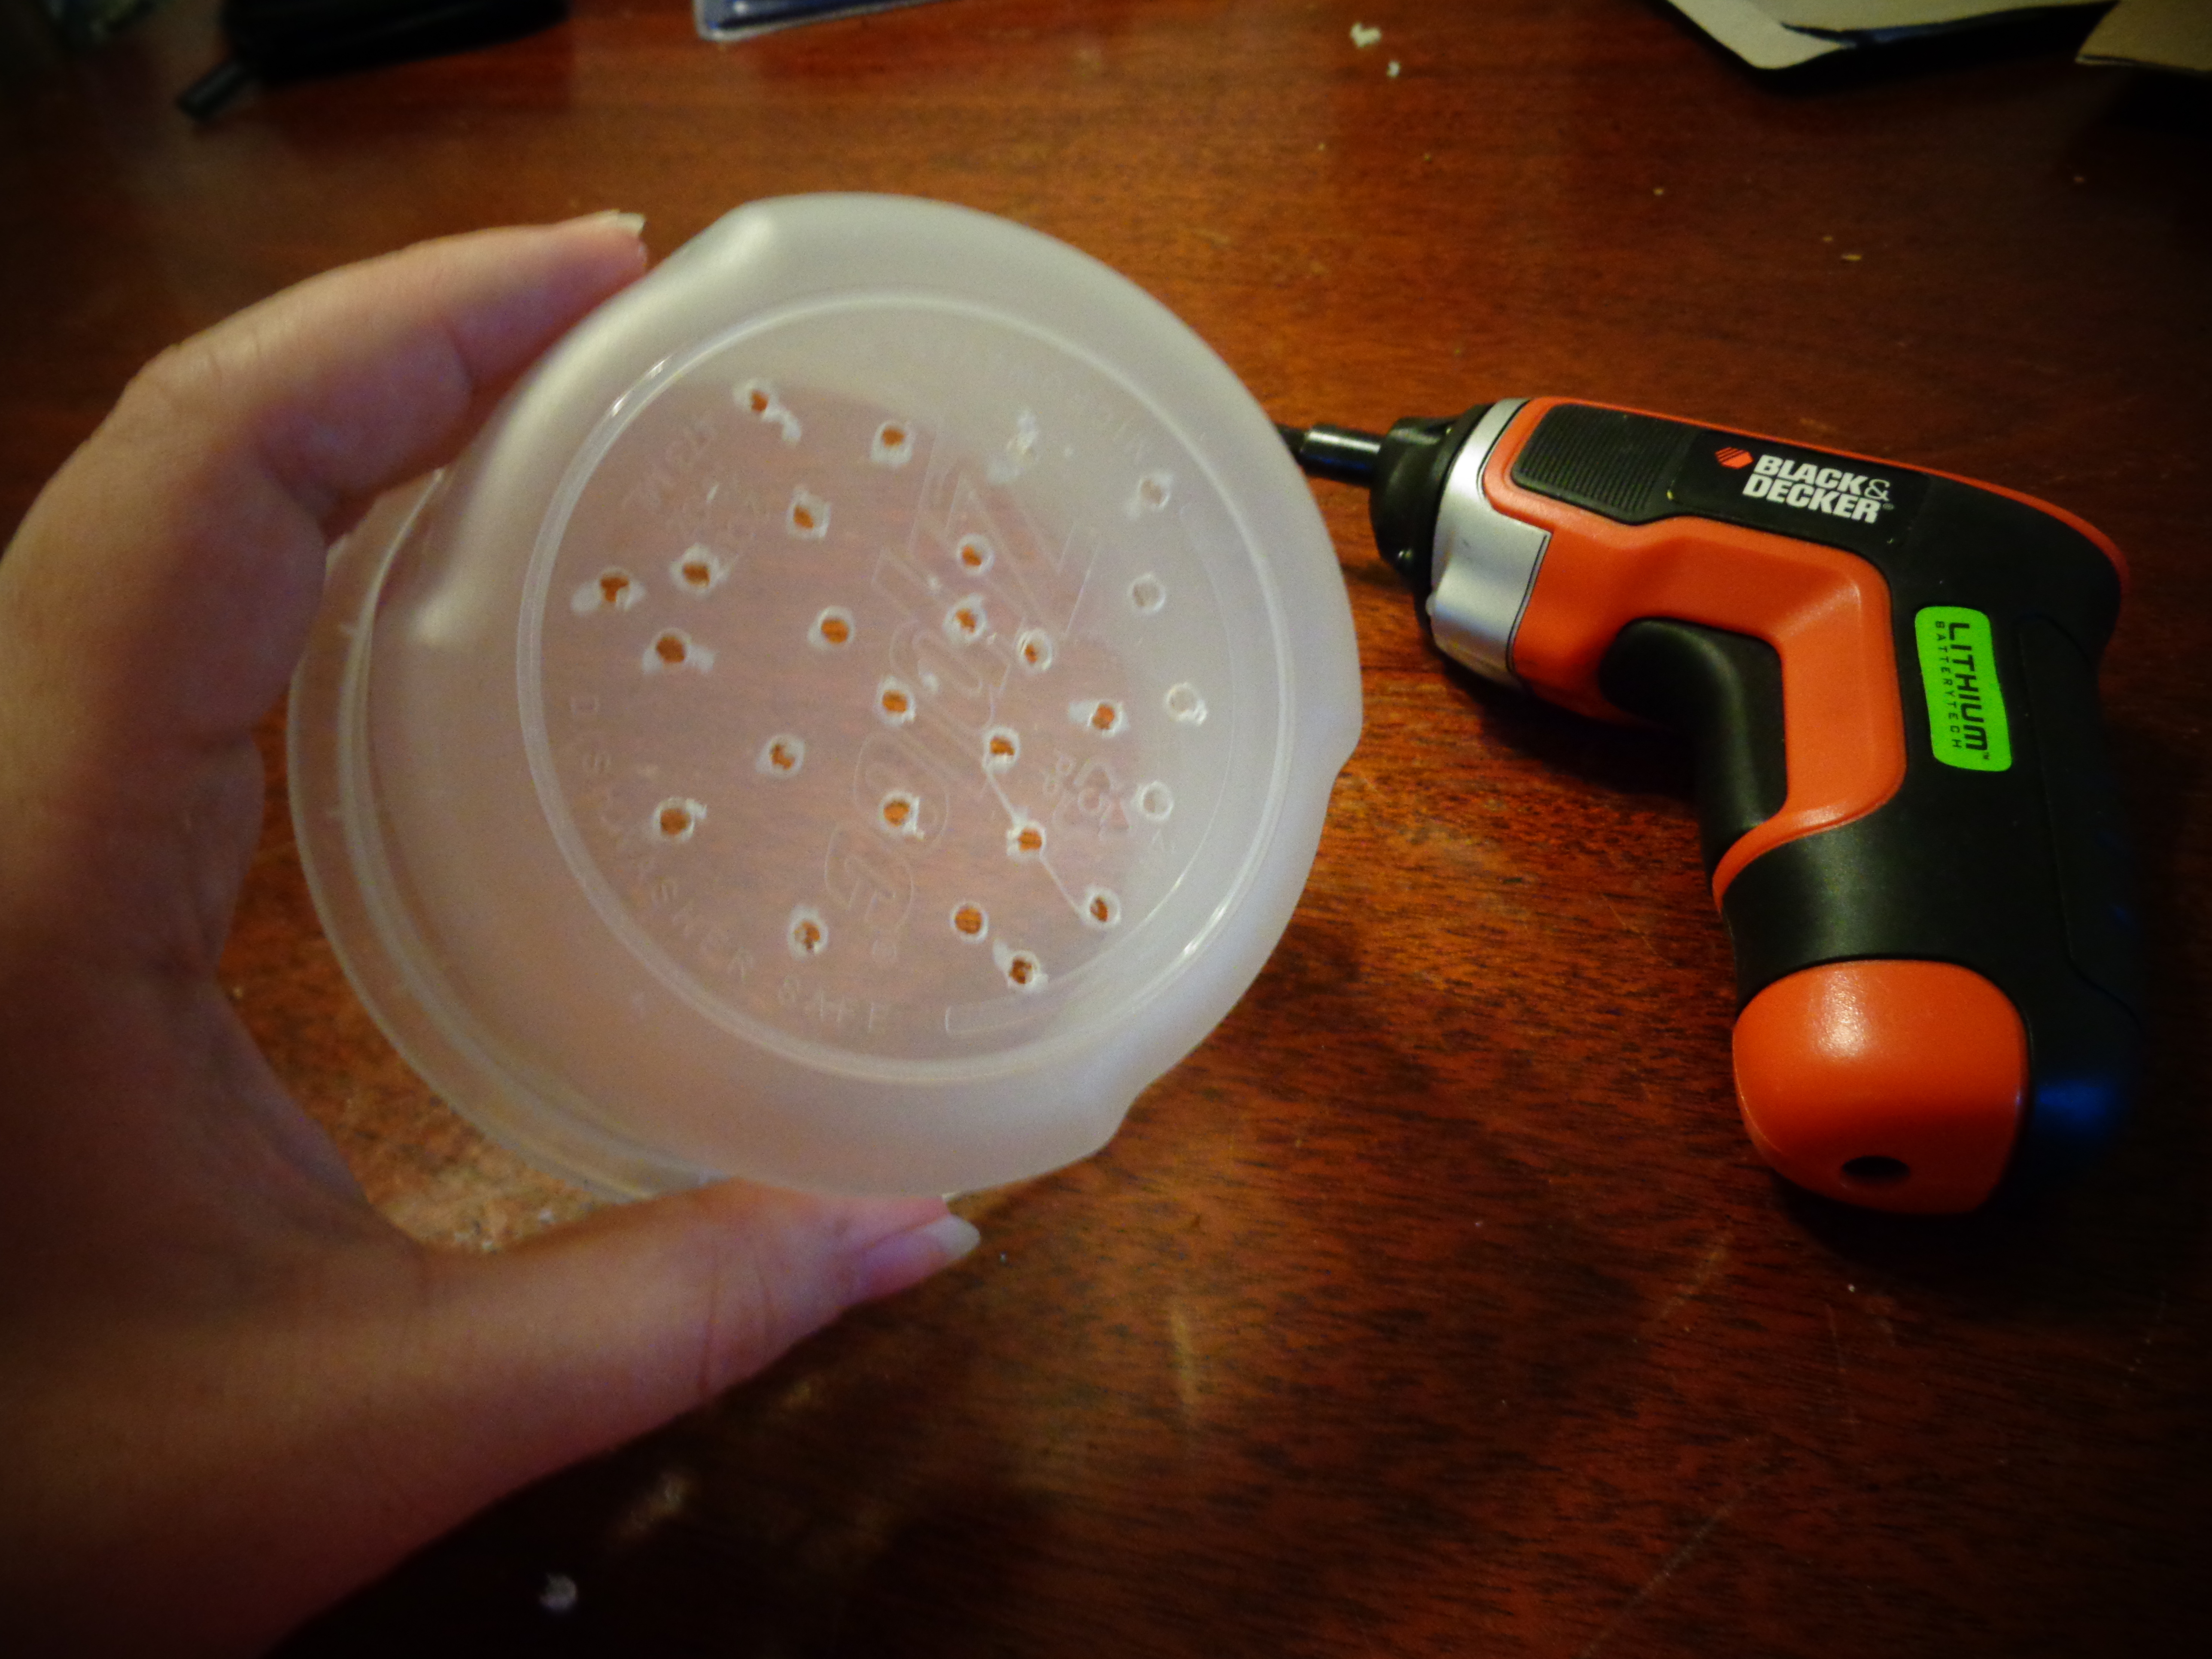
This is what I do: for poopie diapers, I use a diaper sprayer (which is a kitchen sink sprayer that’s attached to your toilet. Really-Google it) to spray and flush the bulk of the poop in the toilet. The sprayed off poopy diaper then joins the other wet diapers in the diaper pail. My diaper pail is just a regular trash can with a lid and lined with a waterproof diaper pail liner. I did spend the extra $10 to get a trash can with a step on the bottom that opens the lid. Really nice when one arm’s holding a kid and the other a wet diaper. Diaper covers that have been soiled along with all liners and wipes also go in the pail. There it all sits until it’s time to be washed. I wash my diapers every day just because a day’s worth of diapers for two babies is a full load for my washer. When they were using the tiny preemie diapers I washed every other day. It’s best not to go longer than that. The diaper pail lives in our bedroom. There is no smell. The liner gets washed with the diapers every 3-5 loads.

To wash, I dump everything into my washer. I’ve heard that high-efficiency and front-load washers are problematic with cloth diapers. I have neither so I can’t testify to that. I run everything through a rinse cycle first to remove the bulk of the urine and what’s left of the soiled diapers after spraying. Next depends on whether I plan on line-drying or machine drying the diapers. If line drying, I add a regular amount of detergent (a homemade detergent made from Fells Naptha soap, Borax and Washing Soda) and run it through a normal cold water cycle. This is generally the last thing I do at night, and they are ready to be hung up in the morning.

Blog 9-15 074

Hubby was kind enough to string up a few lines of clothesline on our front porch, sized to fit the diapers.  It’s quite perfect because the porch gets a ton of sun and I don’t even have to put my shoes on to put out the diapers. Anything that is waterproof, which included diaper covers and diaper pail liners, cannot be hung in the sun, washed in hot water or dried on high heat, least the waterproofing degrades and starts to leak. I just drip-dry mine on the back porch or in the laundry room. They dry quickly. I like line-drying in the summer because I don’t have to pump extra heat into my home by washing with hot water or drying with the dryer.

If it’s going to be rainy or I won’t be around, then after the rinse I just fish out the waterproof covers and diaper pail liners and put them aside to be washed in cold water with regular clothes, and wash the prefolds in hot water with a regular amount of detergent. Then dry in the dryer.

One thing people kept commenting on was how much extra laundry cloth diapers are. I’m not quite sure what the big deal about laundry is–it’s not like I’m dragging a washboard out to the river. I dump the diapers into a machine and push a button. Oh, the horror. Yes, for me it’s a load a day, but I’ve got twins. For a single baby it would be 3 extra loads a week. I found some baskets that fit in my changing table and are large enough so that the preemie and infant sized diapers fit flat, and the regular size is folded over once, so it’s not like I spend a lot of time folding. With line-drying I don’t use hot water, and I make my own detergent so the cost to wash the diapers is minimal. I really don’t get why other people think this is such a big thing.

Cost of Prefolds

Cost is the main reason I use cloth diapers, and prefolds in particular. So, here is a breakdown on what it costs me to cloth diaper:

For the prefolds themselves, you figure out how many diapers your kid will average in a day, multiply that by how many days you plan to go between washing, and add at least 1/2 a day, perhaps even a full extra day. Most of the time you figure 12 diapers a day, washing every other day plus one day equals 36 diapers. You would then purchase 36 diapers. I have twins, so I purchased 60 preemie diapers ($1 each, washing every other day) 36 infant diapers ($1.50 each, washing every day) and 48 regular diapers ($2 each, washing every day and using to catch spit-up while sleeping).  For a total of $210

For diaper covers, I have 6 Flip covers and 2 Econobum covers. The Flip covers are normally $15 but I got them on clearance for $7.50 (the color was being discontinued). The Econobum covers are also $15 each, but those two were gifts at my baby shower. I will include them in the total cost. I also have six newborn diaper covers from ProRaps, four at full price ($16/pair) and two used from Ebay for $9 with shipping. They are designed to fit below the umbilical cord and were used for the first three weeks. Total $116

I purchased 36 diaper liners to prevent diaper rashes at $1 each. I also have 60 cloth wipes at $10.50/dozen, and about 8 Snappies at $6.75/2. Total $115.50

I purchased a step-on trash can with lid ($25) to use as a diaper pail, and two diaper pail liners at $16.50 each. One for the diaper pail, one to wash. I also got a $40 diaper sprayer to connect to my toilet and a $21 wet/dry bag to store dirty diapers in while out and about (for the diaper bag). Total $119

That brings my total up-front cloth diaper investment for twins to $560.50. A singleton baby would probably cost around $400, since you will need fewer diapers and covers but still need just as many diaper pail liners, sprayers, and the like. For ongoing costs, when I line dry my diapers use my homemade detergent which I’ve calculated out at $0.015 (that’s one and one-half cents) per load, at 365 loads per year, or about $5.50/year. I don’t know exactly how much electricity it cost me to run a cold wash cycle, but I don’t have a water bill since we have a well. My geothermal heat pump has a desuperheater attachment to it, so in the summer and winter when the heat pump is working a lot I get nearly free hot water. I’m not motivated enough to calculate the cost of electricity for all the washing, but it’s not going to be a whole lot.

In contrast, at 12 disposable diapers per day per child, estimating a highly conservative  $0.27 for each diaper (with wipes included), the cost to diaper my twins for their first three months would be $591, with another 2+ years to go until potty training. My initial $560.50 investment (did I mention shipping was free?) covers the next 2+ years with only the maintenance costs of $5.50 per year of detergent plus electricity. I’m not even sure I could find diapers consistently at $0.27 each, most sales I see put them at $0.30 each, for a three month cost of $657.

Also keep in mind, if hubby and I ever decide to have more children, we will have already purchased everything we need, leaving only the maintenance costs. After we are done having children, cloth diapers still retain resale value if kept in good condition. I can expect them to retain around 40% of their value. The diaper pail and sprayer won’t be resold, but everything else can be. Taking into account the non-sale cost of the liners, that’s a potential $220 return I can look forward to.

Ready to go cloth yet? 😉

Posted in Economics, Homestead | Tagged , , | Leave a comment

Planting Fruit Trees

I read a wise proverb once about planting a tree:  “It is better to have a $10 hole for a $1 plant, then a $1 hole for a $10 plant”.  Over the years I have learned just how good this advice is.  It doesn’t matter how big, strong and robust your tree is—if it’s in a bad hole it will not do well.  A good hole, however, can help rejuvenate even a sickly plant.  My spring fruit tree planting actually started several months before my trees ever arrived in the mail.  Last fall I went to my local Clemson Extension office and got samples of my soil tested to determine the PH of my soil.  Most trees prefer a fairly neutral PH—somewhere around 6.0 – 7.0, but my area is known for its acidic soils.  I discovered my soil was too acidic (5.5!) and treated the area with lime according to the soil report’s recommendations.  Some of the plants I bought, like blueberries, like and need an acidic PH, so it is important to know the individual characteristics of each species you are planting. The lime was allowed to absorb into the soil for a good two months, and then my trees arrived.

appletree

The hole itself needs to be dug much larger than the container you are planting.  My trees were bare-roots, which means there was no pot, but the same concept applies.  The reason for digging a larger hole is to loosen up the dirt all around the rootball so the new, tender roots can penetrate the soil and grow quickly.  If your soil is well compacted, you also want to ‘roughen up’ the sides of your hole, so the roots don’t encounter a smooth surface when they grow out.  Do not plant your tree deeper than they were in the pot, just backfill the hole until it is the correct depth.

If you have any sort of mole problem, like I do, you will want to build a mole cage for your trees.  A mole cage is simply some chicken wire wrapped around the outside of a 5-gallon molebucket or some similar container.  The top is left open and you are left with a chicken wire “bowl”.  The bowl is placed in the hole dug for the tree, and it protects the young tree’s tender roots from mole damage.  The tree is able to extend roots through the holes, but moles cannot penetrate to get to the root ball.  By the time the tree is larger and more established (say, two years), the mole cage will have rusted away and the root ball is free to grow larger.

Tree1

I chose to purchase the smallest tree size I could find for the varieties I wanted.  This ended up being 1-2’ whisps.  All of my research led me to believe that smaller trees would provide the best chance for success.  With larger trees everything is magnified: the transplant shock is harder to get over because you are dealing with a larger plant.  It is harder to establish because it requires so much more water in the first year, versus a small tree that can be more easily controlled.  A larger plant has more branching and is more likely to be damaged in transport.  The only drawback is it will take an extra year or two to get fruit out of the tree, but, in my climate, where we have such extreme heat, humidity and insects, it made more sense to establish a smaller plant.  This way my chances of having to start all over again in a year or two are greatly reduced.  By the time it is the size I would buy from my local Lowes, the tree will already be adapted to my climate.

The soil where I dug my holes is quite fertile, so I just backfilled the holes with native soil.  I did, however, dig my holes deep enough to put a few shovelfuls of composted horse manure, covered by native soil, before planting the tree.  I also mulched the planted tree with composted horse manure.  I did not place the manure in direct contact with the roots, since I didn’t think it was done curing yet.  The curing process for compost can get quite hot (over 100F!), and roots like to stay cool, so I didn’t want to burn them.  The manure will be well cured by the time the roots get to it, the extra nutrients will encourage the roots to grow downward to build a strong foundation, and the heat generated by the compost will warm up the surrounding soil without burning the plants, both stimulating growth and protecting the roots from any late frosts.

Tree2You see the little knot where the trunk curves a little?  That is where the fruit tree is grafted onto the roots.  This tree is a peach, and like many fruit trees, it is difficult to grow a known breed of peach from seed, so cuttings from a larger, known tree are grafted onto roots.  It is very important to keep the graft dry–make sure it is a good inch or two above ground level.

Lastly, because we are raising two puppies who don’t like to look where they are running and are fascinated by anything ‘new’ or anything ‘stick-like’, we added some above-ground protection for the tree’s first year.  For the pictured tree we staked a section of old PVC from another project a foot away from the tree and zip-tied a few feet of chicken wire to it, making a little fence.  We also added some pretty recycled rubber mulch rings that I got on sale at Lowes.  They will last several years and stay pretty, which is somewhat important, at least in the front yard.

Tree3

Hopefully all goes well!  Stay tuned for updates!

Posted in Garden, Homestead, Uncategorized | Tagged | Leave a comment

How to Make Homemade Veggie Broth

Veggie broth is one of those thing that you use a lot of, and the more you use it, the more uses you find for it!  Veggie broth is very nutritious and versatile–it can be used to pan fry meats and veggies, to make marinades, in soups and stews, and to flavor rice and other grains. The problem with store-bought broth is it’s full of salt and preservatives, and is cost prohibitive, which makes many cooks shy away from it. Homemade veggie broth tastes better, has no salt, no preservatives and best of all–it’s free!

Making veggie broth is so easy–you’ll wonder why you haven’t done it before! All you need to do is stop throwing away veggie scraps and start a broth “collection”.  Your collection will be all the bits and pieces you don’t want to use when you are chopping up veggies for a recipe.  My broth collection usually has a lot of broccoli stalks and ginger root skins in it.  I’ll also throw in onion peels, just-the-wrong-side-of-fresh salad greens (don’t use anything that is rotting, slimy or that has truly gone bad, but wilted and bruised is fine), bruised bits of potatoes, squash skins, the stalks of herbs I cut from the garden, zucchini ends, pepper tops, really anything.  I have learned that, for my family, mushrooms in the collection make a terrible smelling broth that no one will eat (even though we love mushrooms), but you may have different results.  Store your collection in 1-gallon Ziploc bags in the freezer, filling them as you go.  Once you have two full bags of veggie scraps, you will be ready to make broth!

Broth 1

To make the broth, get out your big soup pot (you know the one!) and dump in your two collection bags.  Add one gallon (16 cups) of water and bring to a boil.  Cover, lower the heat and simmer for one hour. Remove from heat, uncover and allow to cool.

Broth 2

So…. That was the hard part! If you can boil water, you can make broth-easy, right?

Now all you have to do is separate out all the veggie bits.  I use a large pasta strainer and my bread mixing bowl to strain out all the larger veggie bits, then strain it all again into another bowl with my jelly strainer. Now all the veggie bits can be disposed of–this is an excellent addition to any compost bin!

Broth 3Broth 4

I bought myself a bunch of 2-cup, stack-able Rubbermaid containers for just this purpose.  Most of my recipes call for either 2 or 4 cups of broth, so I just measure out 2-cup at a time and freeze them into giant veggie broth ice cubes. The broth freezes very well–I’ve used it as long as 8 months after I froze it with no reduction in quality or flavor!  To use the frozen broth cubes, I usually just dump the cube directly into the pot or pan I’m cooking with and thaw it out on the spot, but occasionally I remember to transfer what I need the night before to thaw it in the fridge.

Broth 6

  The larger container is what I will use within the next week or so.  I’ve planned a few soups which are heavy on broth, so I don’t need to freeze that portion, just refrigerate. This recipe will give you one gallon (16 cups) of homemade veggie broth.  Be sure to label the freezer containers with the date and contents!  Happy cooking!

Broth 7

Posted in Cooking, DIY, Economics, Uncategorized | Tagged , | Leave a comment

Making Grape Jelly on the Farm

             The new house that hubby and I just bought included two mature muscadine grape vines. I’ve never tried canning before, but it’s been something on my to-do list for becoming more self-sufficient.  I figured that while, yes, we were still unpacking, why let all those awesome grapes go to waste?

I wanted to learn how to make jelly the old-fashioned way, before adding additional pectin became popular.  Pectin is a compound found naturally in many fruits and is what allows the juice to congeal into jelly—sort of like how jell-O goes from liquid to bouncy.  Adding additional pectin allows the juice to congeal with a higher percentage of water in it, so you get more jelly per pound of fruit.  The downside is you have to buy additional pectin, and I wanted to learn how to do it the down-home homestead way. I found some great tips and information on the National Center for Home Food Preservation’s web site: http://nchfp.uga.edu/how/can_07/muscadine_scuppernong.html

Phase 1

First, I picked the grapes. I cut off the top of an empty plastic gallon water jug and used it to hold my grapes.  From my two vines I collected right at a gallon of grapes.  Not much, but enough to learn on. The fruit I picked was in all stages of ripeness, but I made sure to include a handful or so of barely-ripe grapes because a friend told me they have the most pectin.

grapes 1

Next I cleaned the grapes.  Nothing really special about that—just ran them under the faucet and made sure there were no obvious twigs or bugs in there.

grapes 2

I then crushed the grapes in order to release the juice.  That part was hard—muscadines have thick skins!  I used a big mixing bowel and sturdy potato masher.  This step probably took a solid 15-20 minutes, but it’s important to crush every grape. 

grapes 3

Next I transferred the whole mess to a big saucepot on the stove—this step is all about evaporating the excess water from the juice, so you want to have a wide, shallow pan to allow maximum evaporation. I brought the crushed grapes to a boil and simmered them for a solid 10 minutes.  This was also a good time to hunt down any uncrushed grapes that had escaped thus far.   

grapes 5

After I removed the saucepan from the heat and allowed it to cool, I retrieved my strainer and mixing pot (which I had rinsed out) and separated the juice from the pulp.  This took a few tries and I had to use my potato masher to squeeze more juice out of the pulp, but I eventually got it all out. The yield was about 3½ cups of juice.  I then transferred the juice to a plastic container with a lid and stuck it in the fridge to set overnight. I do not know if you have to refrigerate the juice before making the jelly, but everything I read said to do it and I didn’t have time to complete the recipe anyway, so…..

grapes 6

This first phase was completed after work one evening and took me right at two hours—which included the time to go outside and pick the grapes.  While the grapes were simmering I prepared a quick dinner and stuck it in the oven. 

Phase 2

Two nights later I decided to finish the jelly, so I removed the juice from the fridge and ran it through a fine strainer to remove any remaining seeds or small bits of pulp. 

grapes 8

Next I sterilized my jars and canning tools.  I put the jars and tools in a big soup pot and filled with water until the jars were covered, then I brought everything to a boil and let it go for 10 minutes.  I was really confused on what to do with the can lids—I know you shouldn’t boil or heat them too much because the wax right around them will melt and will not produce a good seal, so I just washed them as thoroughly as I could. 

grapes 9

Once the jars and tools were done boiling I put them on a clean cookie sheet and stuck them in my oven, which I had pre-heated to 200 degrees.  It’s important to keep your jars hot so that they won’t cool down and crack when you fill them with boiling hot jelly.  I kept the pot and hot water for later.

grapes 12

I also placed several clean metal spoons on a clean plate in my freezer.  I would use these later to see if the jam was ready to be canned.

grapes 10

The juice got put back in the saucepan and was brought to a medium boil.  I slowly added just over 2½ cups of sugar, one half-cup at a time, until it was all dissolved.  The recipe called for 3 cups of sugar and 4 cups of juice, but I only had 3½ cups of juice, so I had to make do and estimate. I stirred the jelly the entire time it was boiling.  The only things going into this recipie is fresh grape juice and sugar.

Once I noticed a foam layer appearing on top of the juice, I started testing it with my chilled spoons to see if it would “sheet”.  The test was a lot easier than I thought—basically when the juice isn’t ready, it will drip off the spoon after you stick it in.  Once it’s ready, those drops will form into a “sheet” and come off all at once.  It’s because the jelly is congealing as soon as it cools, so it’s getting thicker very quickly even though it’s still a liquid at boiling temperature.  Those used spoons were good for licking, too.

grapes 11

Once the jelly was ready I quickly skimmed off the foam layer, grabbed the jars out of the oven, and used my sterilized big canning spoon to scoop the juice into the jars, leaving a small headspace gap on the top.  Then I placed the metal jar caps and rings on and tightened them down—the jars were really hot so that required one of my canning tools.  I got a whole kit of tools for $12 and they definitely came in handy, even if I didn’t use every single one of them.

grapes 13

Turns out I had exactly enough juice to fill three 8-ounce jars.  I had read that I didn’t need to process the cans further for jelly, but I was paranoid that I hadn’t cleaned my lids well enough, so I went ahead and processed them.

To process, I returned the filled jars to my soup pot and water, making sure the jars were completely submerged. I boiled the jars for another 10 minutes.

grapes 14

I carefully removed the jars from the hot water using another one of my canning tools and put them on the stovetop to cool. I read that I needed to wait to hear a “pop” from each jar to make sure it sealed properly.  The “pop” is caused by the air inside the jar contracting as it cools and forming a vacuum.  The vacuum sucks the top of the lid down, causing a quick “pop” sound.  Only a few minutes went by before my first pop, with the third pop occurring 5 minutes after that. Happy-dance time!

grapes 15

Phase 2 only took an hour, start to finish, but there was a lot going on.  I wouldn’t have had time to do anything else while I was working on phase 2 like I did in phase 1.

That weekend hubby and I sat down to a Southern breakfast tradition: warm biscuits and homemade muscadine jelly.  It turned out great!  Canning seemed pretty intimidating at first, and I still have questions, but at no point was I faced with a rocket-scientist type problem, and none of the steps were all that difficult. I look forward to next year when my garden is up and running and I can preserve some other things! Yum yum!

Posted in Cooking, DIY, Garden, Homestead | Leave a comment

Recycling Cardboard in the Garden

Hubby and I have been moved into our new house for almost four weeks now, and I ran into the problem of what to do with all those empty moving boxes. Yes, I could just fill up the truck and take them to the county recycling center, but why let them have all the fun?

Recycling

I managed to find a use for the cardboard that solved several problems at once. First, I had a ton of cardboard, much of which was no longer usable for moving or storage, since they had also helped my grandfather move a year earlier and were showing more than just a little wear-and-tear. I couldn’t just give them away to someone else who was moving. Also, since we closed six weeks later than originally planned, and the sellers moved out on the date originally planned, there was a six week period where the lawn was not mowed. In July. During the rainy season. We did ask the sellers to mow the lawn (all three acres of it) before the closing, and they did, but we didn’t think to ask them to rake up all the thatch.

Needless to say, while I was inside cleaning and painting like mad to meet the move-in-day deadline, poor Hubby was outside raking up a 2” thick later of thatch that would have killed the lawn if not removed quickly. In July. During the humidity season. Poor guy.

I identified an area suitable for a veggie garden and had Hubby toss all the thatch in that general area to be composted. It turned out to be quite a pile! About two weeks after moving in most of the unpacking had been done and we turned our attention to the garden. We fenced in the area to make it chicken-proof and I spent some time removing all the tape from the empty moving boxes.

Cardboard 1

First I layered the cardboard two layers thick and then covered it with about 8” of thatch, starting around the edges and moving my way toward the center where the Giant Pile of Thatch was. The beauty of this is that the cardboard and thatch will kill the lawn underneath so I don’t have to kill myself tilling next year, and the cardboard and grass will all compost down by spring, enriching the soil in my new garden! As an added bonus, I don’t have to haul all those boxes to the dump, so I save gas and labor. How green can you get?

Cardboard 2

This is as far as I’ve gotten so far–I ran out of cardboard! Guess it’s time to unpack the rest of my boxes. I’ve brought my strawberries from my old house and the one lonely tomato that didn’t get root bound and die in the extra six weeks it took to close. The containers will just sit on top of the thatch and I put the tomato in the ground, using cardboard and thatch as mulch. This is a fairly small garden, 16’ X 16’ or so, but it will do for the next few years until we start on the raised garden box project in another area of the yard. I also plan on using this cardboard method in a large flower bed in the front yard which has become overgrown–I doubt I’ll have time this year to bother with planting any flowers, so why not make it easier on myself in the spring? You can bet the county won’t be getting any more of my cardboard now that I’ve found a use for it!  I can forsee myself hoarding a year’s worth of cardboard in a shed somewhere just waiting for fall so I can lay it all out in my planting areas!

Posted in DIY, Garden, Homestead | Tagged , , , , | 1 Comment